DIY: Teapot Wall Planters – A Quirky Way to Add Flowers to Your Home!
A Mad Hatter-Inspired DIY: Bring Alice's Tea Party to Your Walls

As a tea enthusiast and lover of all things whimsical, I always find ways to incorporate my passions into my projects. While working on a hotel redesign in Paris—where colour, romance, and floral artistry were key elements—I wanted to find a way to add even more flowers to the space. And, of course, I wanted to capture a touch of that “Mad Hatter’s afternoon tea” vibe, blending British and French design. That's when the idea of turning vintage teapots into charming wall planters came to life! Not only do they add whimsy and colour to any room, but they’re also an excellent way to bring the outdoors in, even when space is limited.
What’s even better? I found a way to securely hang them without breaking the delicate porcelain, so they’re both functional and fabulous!
Why This DIY Project is a Game-Changer
If you’re looking for a playful, creative way to incorporate flowers into your home without the need for traditional planters, this is the project for you! It’s a perfect blend of vintage charm and functionality, giving you an opportunity to showcase your love for tea, floral beauty, and home décor. Plus, the teapots are upcycled, making it a sustainable and budget-friendly home hack.

Hotel La Petite Rosa - Rainbow Shaker
Materials You'll Need:
To get started, here are the materials you’ll need for this colourful DIY project:
Teapots (preferably vintage or colourful ceramic, but plastic works too!)
A drill with a diamond bit (to drill through ceramic)
Brass Slotted Glass Plates (1 per teapot)
Nut and bolt system (to attach the teapot to the plate)
Wall hook or nail (for hanging)
Hammer
Flowers (fresh or artificial, depending on your preference!)
LET'S DIVE INTO THE TUTORIAL
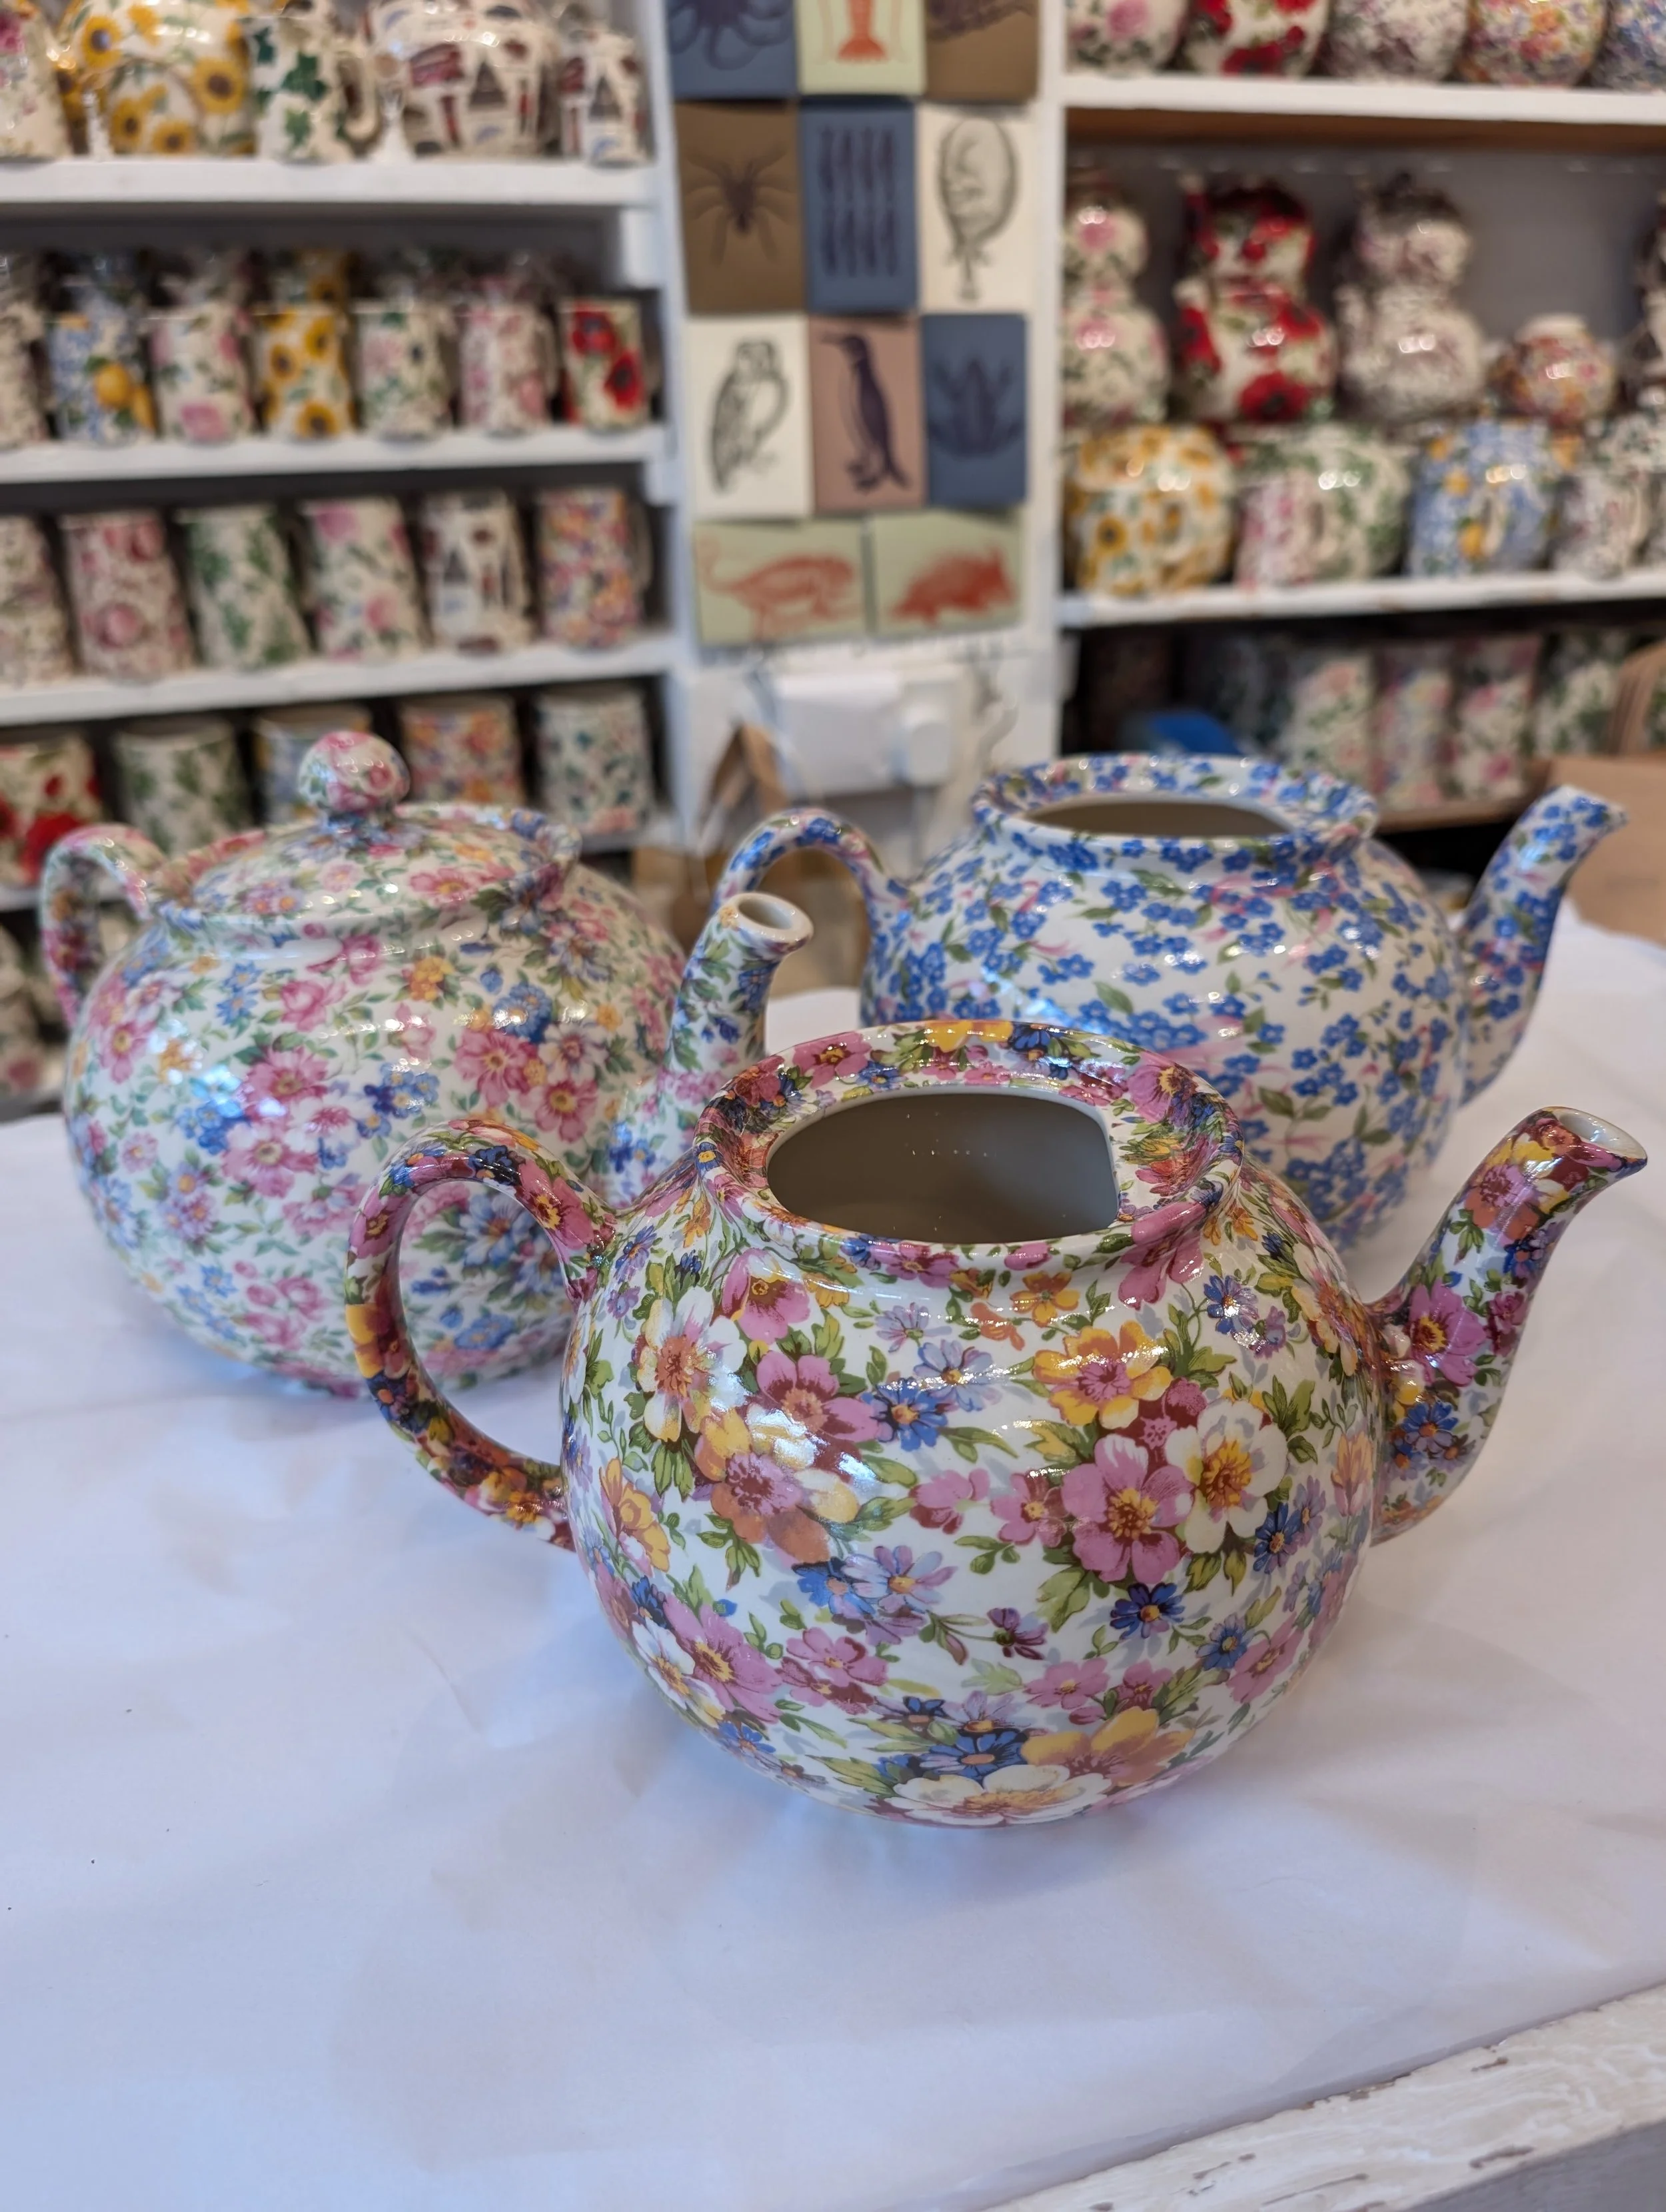
Step 1: Find the Perfect Teapots
The first step is to find the perfect teapots for your project. I visited a few second-hand shops to find colourful ceramic teapots, but you can also choose plastic ones, which might be easier to work with. Look for ones with fun designs and vibrant colours to match your home décor. Bonus points if you find ones with quirky shapes!

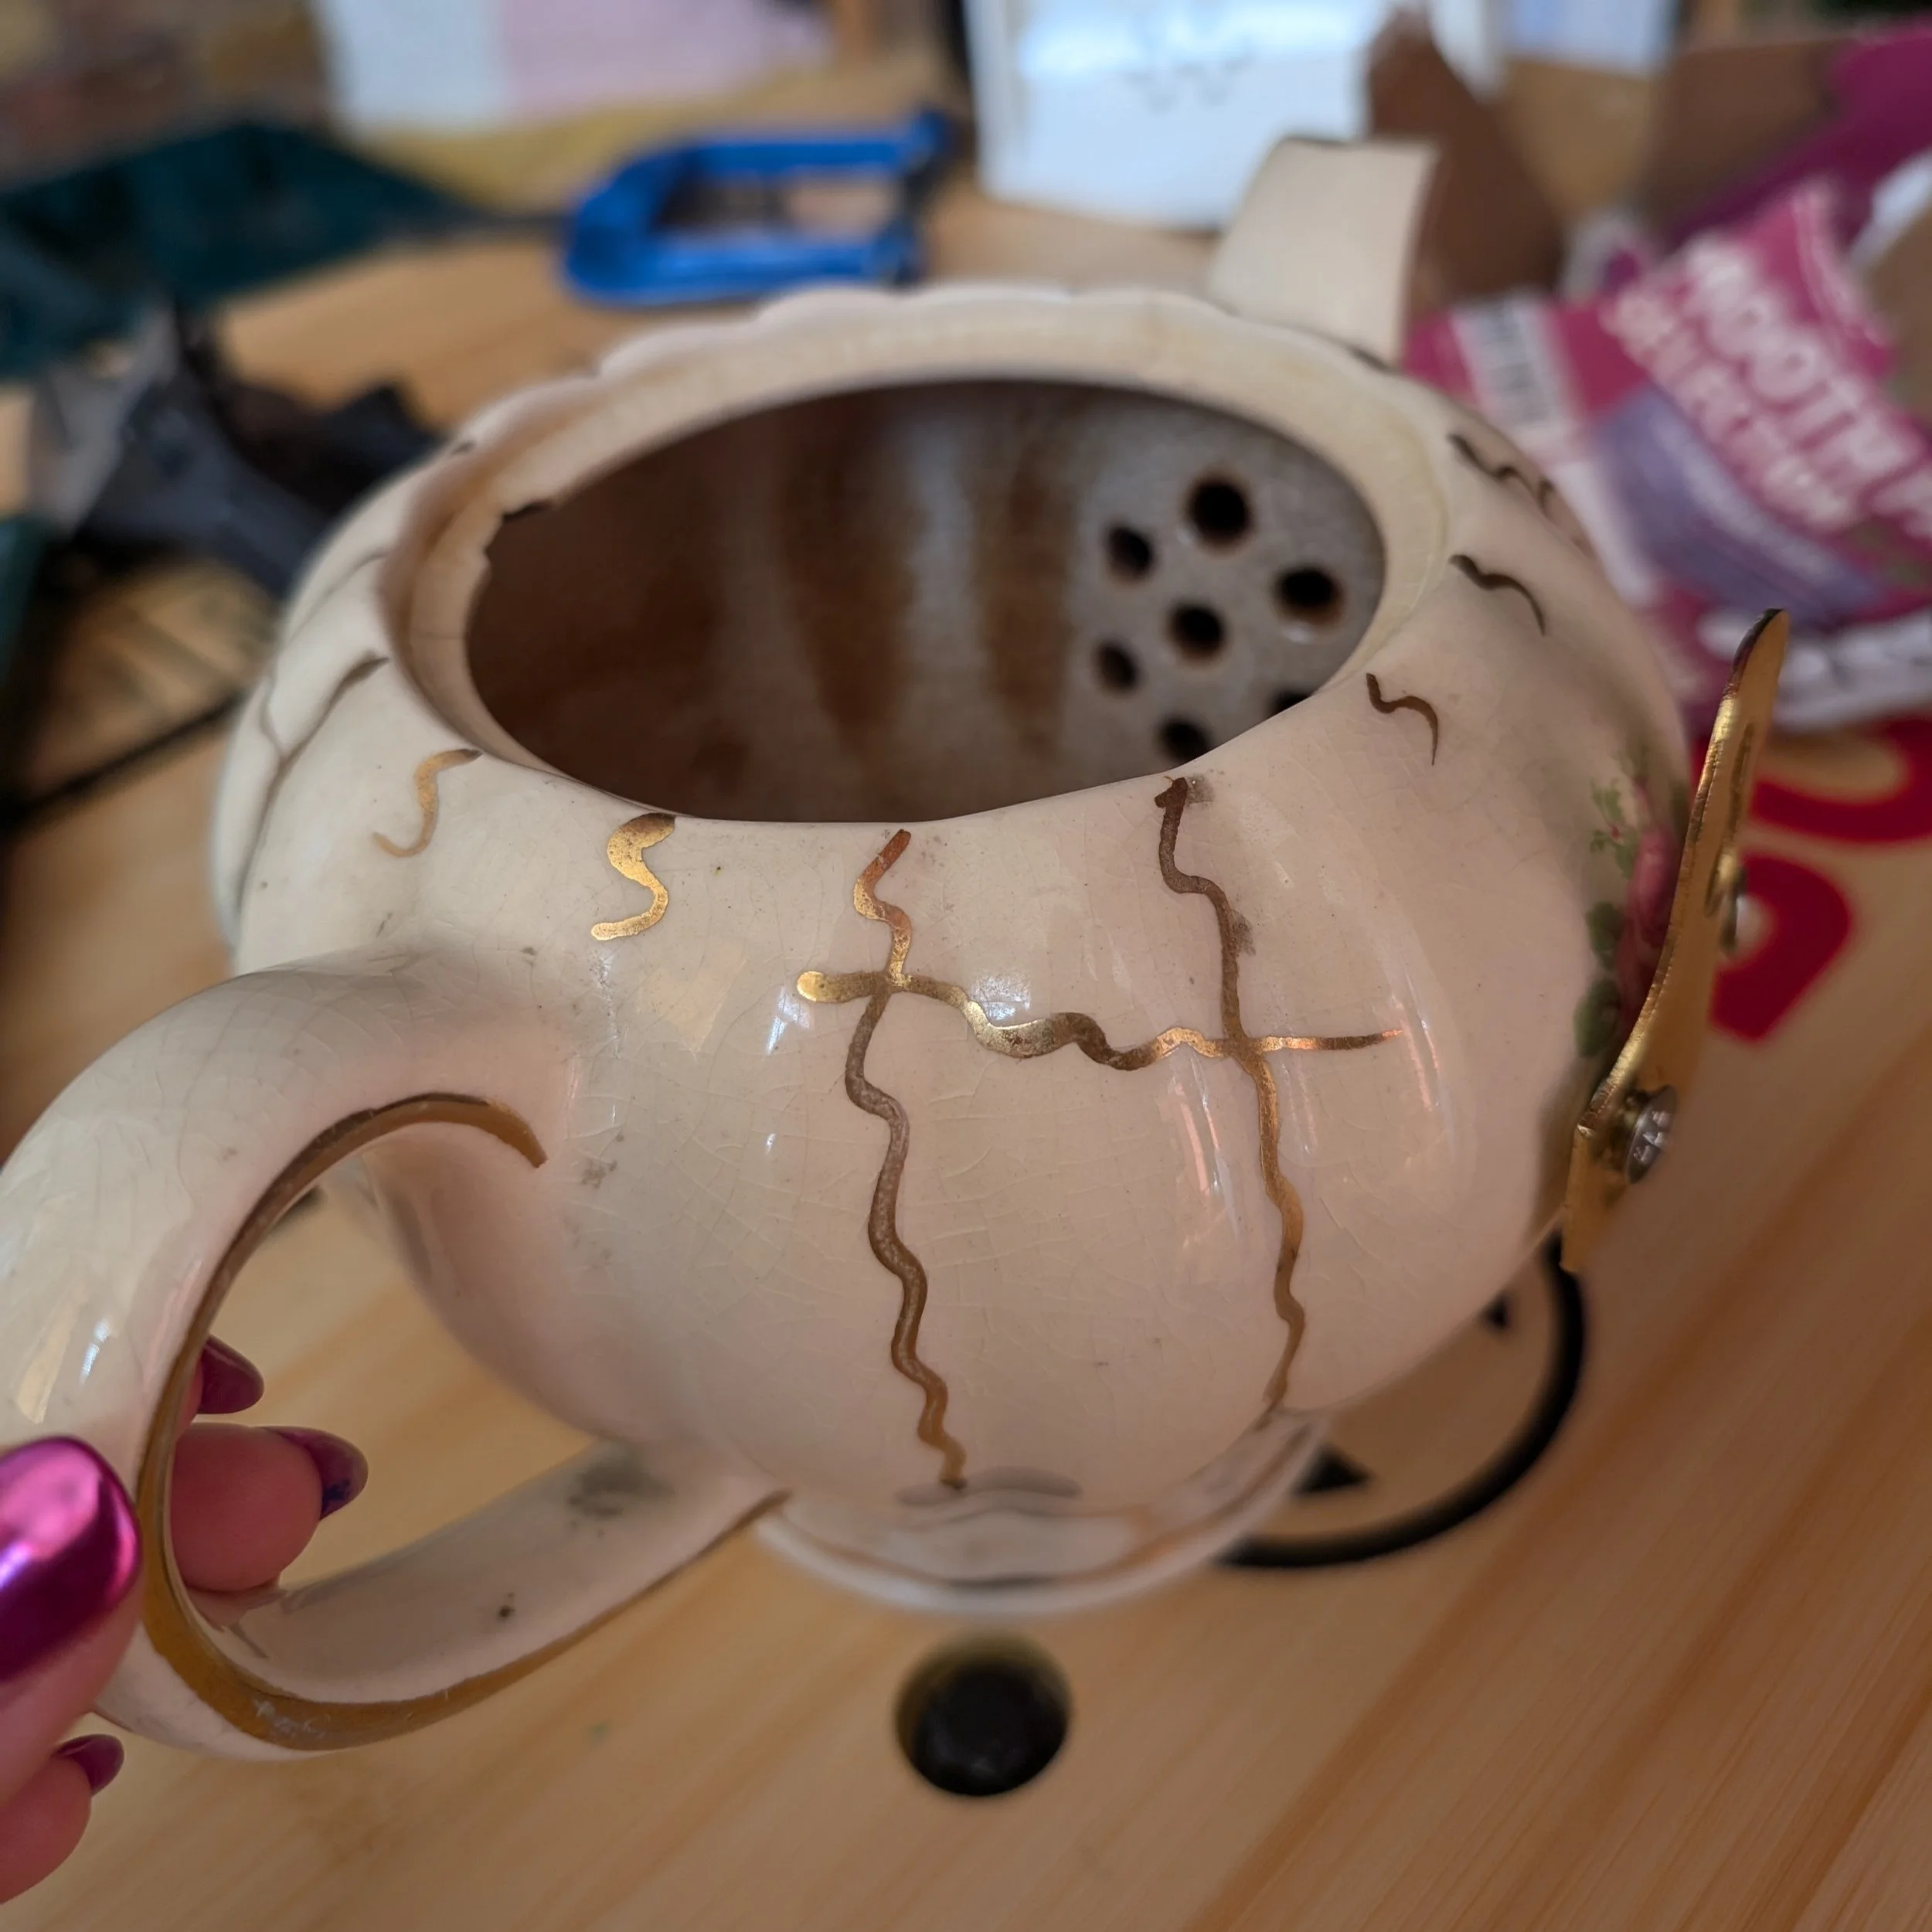
Step 2: Drill the Teapot
This step requires a lot of care. To drill through the ceramic teapot, you’ll need a diamond bit to ensure you don't crack or shatter it. You’ll be relieved to know that you don’t need an overly thick teapot—thin ones are actually better, as they’ll be easier to drill through and require less time. Be sure to drill perpendicular to the surface and apply only light pressure. If the bit gets too hot, take breaks to cool it down.
We broke one teapot on our first attempt, so I recommend starting on the teapot lid (if you don’t plan to use it) to practice. Once you feel confident, proceed to the body of the teapot.


Step 3: Attach the Plate
Once you’ve drilled the hole, it’s time to attach the brass slotted glass plate to the teapot. Insert the nut and bolt system through the hole you drilled, and then attach the plate. This is what will hold the teapot securely when it’s hung on the wall. Make sure everything is tightened properly to avoid any wobble.

Step 4: Hang the Teapot on Your Wall
Next, it’s time to hang the teapot. Hammer a nail into the wall, or use a wall hook, and then install the Brass Slotted Glass Plate onto the hook. The plate’s keyhole will make it easy to slide and secure the teapot in place. I love how these teapots can be arranged in rows or scattered across the wall for a whimsical floral display!
Step 5: Fill Your Teapot with Flowers
The fun part! Fill your teapots with fresh or artificial flowers to complete the look. You can use a mix of blooms or just one type, depending on your style. Whether you’re filling them with roses, wildflowers, or succulents, the teapot planters will bring a pop of colour and a touch of floral elegance to your space.


Tips for Success:
Choose Sturdy Teapots: Make sure the teapots are sturdy enough to hold flowers and aren’t too fragile to drill through. However, thin teapots are faster to drill through!
Be Gentle with Drilling: Ceramic can be fragile, so take your time and apply light pressure to avoid damaging the teapot.
Consider Floral Types: Depending on the size of your teapot, you can use small flowers or even go for something with more volume, like trailing ivy or a fern.
Placement is Key: Think about where to place your teapot planters—above a sink, in a hallway, or as part of a gallery wall.
Conclusion: Add a Touch of Whimsy to Your Walls!
These DIY teapot wall planters are more than just a quirky décor idea—they’re a playful and functional way to brighten up any space. Whether you’re creating a charming floral display in your bathroom, kitchen, or living room, these teapots bring a touch of personality and colour to your home. And who wouldn’t love to show off their tea-time floral arrangements in such a unique and charming way?

For La Petite Rosa Hotel, we installed the teapot planters on a hidden closet facing the lift. The client loved them so much that they asked me to add more in the breakfast room! You can see the full project on my website here.

Want to embrace more colourful and creative home décor ideas?
Check out my online course, Colour Your Home Happy! It's a fun, interactive experience designed to help you break free from design rules and create a colourful home that reflects your true personality ✨.
Show Off Your Creation!
I can’t wait to see your teapot wall planters in action! Share your creations on social media and tag me @rainbow.shaker so we can spread some floral, whimsical joy together!
Happy crafting 🌼🎨!